BasideWT- Whole Home Water Filtration System & Replacement


How to Clean a Reverse Osmosis System: A Step-by-Step Guide for Maintenance
If you have a reverse osmosis (RO) water filtration system in your home, you probably already know how effective it is in providing purified drinking water. However, just like any other system, it requires regular maintenance to ensure it continues working efficiently. How to clean a reverse osmosis system is a common question many homeowners ask. In this guide, we’ll provide you with the essential steps, tips, and best practices for cleaning and maintaining your RO system.
Cleaning a reverse osmosis system is essential for extending its lifespan, improving water quality, and ensuring the system is running smoothly. While the cleaning process can seem intimidating, it is relatively straightforward when done correctly. So, let’s dive into the step-by-step guide.
Why Regular Cleaning of Your Reverse Osmosis System is Essential
Before we dive into the cleaning process, let’s discuss why regular cleaning is important. A reverse osmosis system operates by filtering out contaminants from your water through a semipermeable membrane. Over time, minerals, bacteria, and other particles can accumulate within the filters, which can impact the efficiency of the system.
1. Prevents Contaminant Build-up
If not cleaned properly, mineral build-up and bacteria can clog the membrane and the filters, reducing water flow and filtration capacity. This can lead to higher energy consumption and reduced water quality.
2. Maintains System Efficiency
A clean system ensures that each filter functions properly, delivering high-quality water to your home. Neglecting cleaning can cause the system to work harder, leading to wear and tear, and potentially a costly breakdown.
3. Extends the Life of the System
By keeping the system clean and well-maintained, you can prolong its lifespan, saving you money on repairs or replacements. Regular cleaning can also minimize the need for professional servicing.
Step-by-Step Guide: How to Clean a Reverse Osmosis System
Now, let’s walk you through the process of cleaning your reverse osmosis system. Each manufacturer may provide specific guidelines, so be sure to refer to your system’s manual as well. However, the general process involves several common steps.
Step 1: Turn Off the Water Supply and Drain the Tank
To begin, turn off the water supply to your reverse osmosis system. You don’t want water flowing through the system while you’re cleaning it. Next, drain the tank to relieve pressure within the system and prevent water from spilling when you remove the filters.
Tip: Some systems may have a specific valve or switch to help you quickly turn off the water. If your system doesn’t have this, simply shut off the main water valve to the unit.
Step 2: Remove the Filters and Membrane
Once the water has been turned off and the tank is drained, you can start by removing the filters and membrane. Your reverse osmosis system will usually have several stages of filtration, such as:
- Pre-filters (often a sediment filter or carbon filter)
- RO Membrane
- Post-filters
For each filter, follow the instructions in your manual on how to carefully remove them. Be cautious not to damage the filter housing. You can use a filter wrench to loosen the filters if needed.
Step 3: Clean the Filter Housings and Parts
After removing the filters and membrane, it’s time to clean the filter housings. Use a soft cloth or brush to wipe down the interior of the filter compartments. For stubborn residue, you can use a mild vinegar solution (1 part vinegar to 3 parts water).
However, avoid using harsh chemicals or abrasive cleaning products that may damage the plastic or rubber seals inside the system. Rinse thoroughly to ensure no cleaning solution residue remains.
Step 4: Clean the RO Membrane (if applicable)
Cleaning the RO membrane is a delicate process. The membrane is a vital part of the filtration system and should be handled with care. Some systems require periodic cleaning of the RO membrane to remove mineral buildup and organic matter. Here’s how you can clean it:
- Prepare a cleaning solution using a mixture of water and a membrane cleaner designed for RO systems.
- Soak the membrane for a few hours or as recommended in the manual.
- Gently scrub the membrane with a soft brush if necessary.
It is important to note that membrane cleaning should only be done occasionally and that it has a limited lifespan. If your RO membrane is damaged or overly fouled, it may be time to replace it.
Step 5: Replace the Filters as Needed
Now that the system is cleaned, it’s time to replace the filters. Most reverse osmosis systems have replaceable pre-filters, post-filters, and membranes. Depending on your water quality and the manufacturer’s recommendations, you should replace these filters every 6 to 12 months.
- Pre-filters (Sediment & Carbon Filters): Replace every 6 months.
- RO Membrane: Replace every 2 to 3 years.
- Post-filters: Replace every 12 months.
Tip: When replacing filters, be sure to match the model and size specifications to avoid compatibility issues.
Tips for Keeping Your Reverse Osmosis System Clean Longer
To reduce the frequency of cleanings and ensure that your system stays in good working condition, here are some preventative maintenance tips:
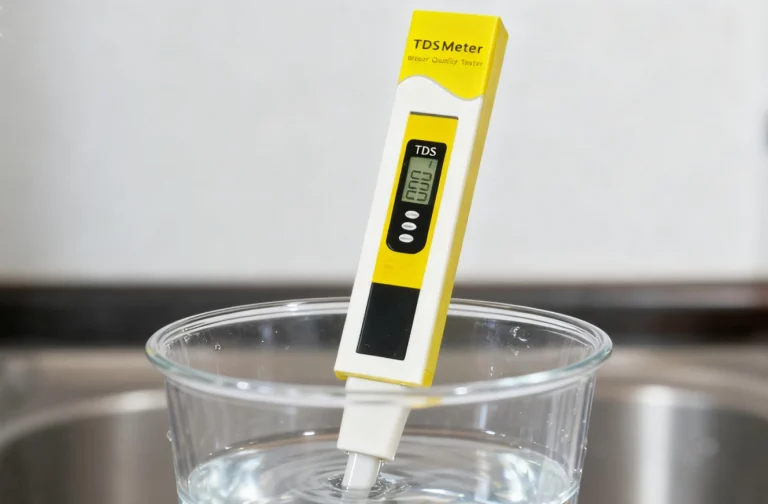
1. Regularly Monitor the Water Quality
Keep track of your system’s performance. If you notice a decrease in water flow or a strange taste or odor, it might be time for a cleaning. The sooner you address the issue, the easier it will be to clean the system and restore its efficiency.
2. Pre-Filter Protection
Install a pre-filter that removes sediment and larger particles before the water enters the reverse osmosis system. This will help extend the life of the RO membrane and reduce the likelihood of clogs.
3. Check for Leaks
Inspect your system regularly for any leaks or cracks in the housing. Leaks can lead to contamination and may require immediate attention.
Common Problems and Solutions: How to Tackle Reverse Osmosis System Issues
Even with proper maintenance, you may encounter certain problems with your RO system. Here are some common issues and how to solve them.
1. Low Water Pressure
Low water pressure can occur if the RO membrane is clogged or the filters need to be replaced. Solution: Clean or replace the filters and check for any blockages in the system.
2. Bad Tasting Water
If your water starts tasting strange, it could indicate a buildup of contaminants or dirty filters. Solution: Clean the filters and membrane, and replace them if necessary.
3. No Water Flow
A lack of water flow could indicate a clogged filter or malfunctioning RO membrane. Solution: Clean the filters, flush the system, and check for any blockages or leaks.
4. Foul Odors
Foul odors in the water can arise from bacterial growth in the system. Solution: Clean all parts of the system with a vinegar solution, replace any filters that show signs of contamination, and sanitize the system if necessary.
Case Study: Cleaning a Reverse Osmosis System in Action
Let’s consider the case of a family living in a region with hard water. After a year of use, their RO system began to show signs of reduced water flow and a slight change in water taste. Upon cleaning the system using the steps outlined earlier, they found significant mineral buildup in the filters and membrane.
After thoroughly cleaning the filter housings and replacing the pre-filters, the water flow returned to normal, and the taste improved significantly. The family continued to monitor the system every 6 months and followed the manufacturer’s advice on filter replacements, resulting in improved water quality and prolonged system performance.
RELATED POSTS
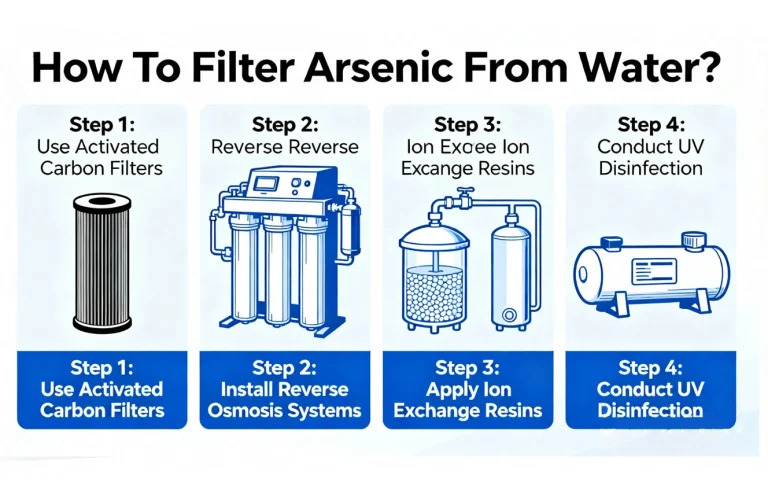
How To Filter Arsenic From Water?
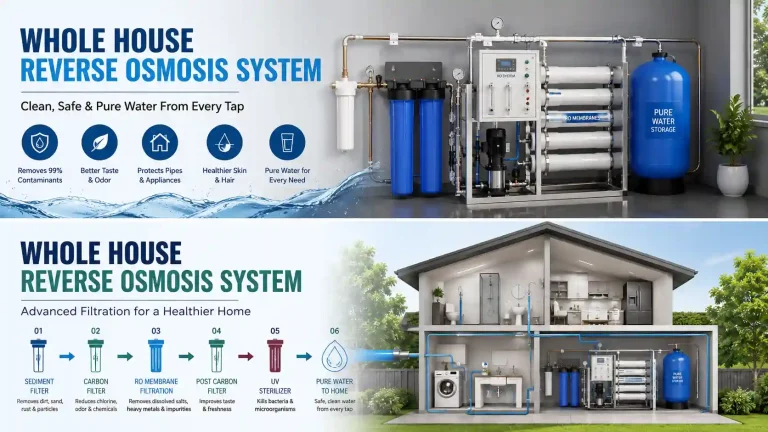
Whole House Reverse Osmosis System: A Complete Guide to Cleaner Water for Every Tap
Water Treatment Plant Private Operator Contracts in China: A Complete Guide for Decision-Makers
Is RO Water Safe to Drink?
Reverse Osmosis Ro Water Storage Sank -BasideWT