BasideWT- Whole Home Water Filtration System & Replacement


Water Filter Housing Replacement: When & How to Replace It
Water filter housing replacement becomes necessary when the housing itself is cracked, leaking from the threads, corroded, or too old to seal reliably, not simply because the water flow has slowed down. A slow flow or bad taste usually points to the cartridge instead. Knowing which part has actually failed is the difference between a five-minute fix and an unnecessary purchase.
This guide walks through exactly how to tell the two apart, what causes housings to fail, and how to pick a safe, compatible replacement. For a broader look at how these systems fit together, our complete guide to water filter housings covers types, sizing, and maintenance in more depth.
When Should a Water Filter Housing Be Replaced?
A water filter housing should be replaced when you see cracks, warped plastic, corroded metal parts, stripped threads, or leaks that continue after fresh O-rings and proper tightening. Repeated leakage at the same spot, brittle or discolored plastic, and housings older than 8 to 10 years are also strong signals. If the body itself is compromised, no amount of cartridge changing will fix it.
That short answer covers the basics. The rest of this guide explains how to confirm the diagnosis and choose the right replacement.
Cartridge Replacement vs. Housing Replacement
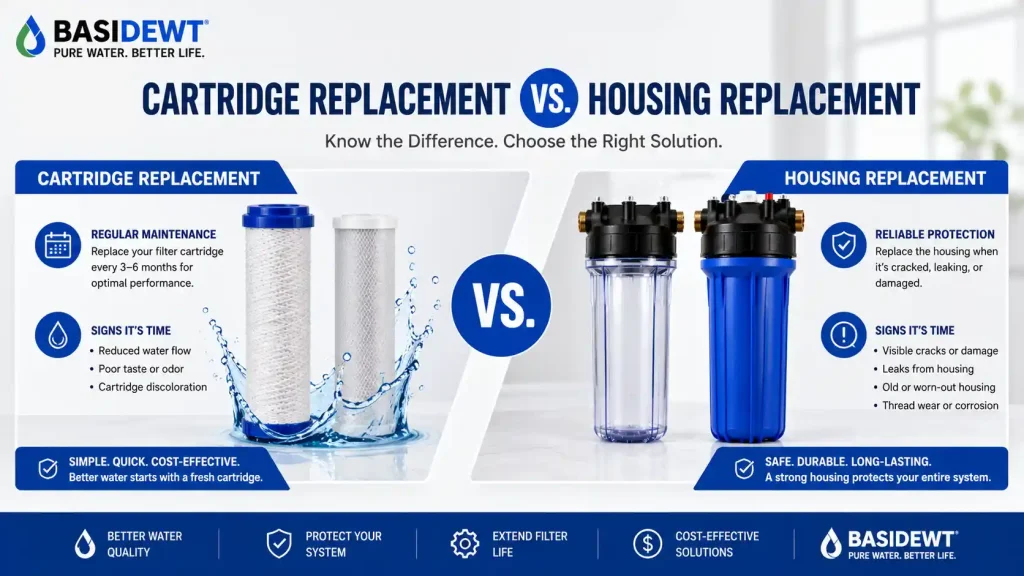
People often assume any water filter problem means buying a whole new unit. In most cases, it doesn’t. The cartridge inside does the actual filtering, and it wears out on a schedule. The housing is the shell around it, and it should last for years if it isn’t damaged.
If you’re new to how these parts relate, our guide on what a water filter housing actually is explains the basic anatomy.
Here’s the simplest way to separate the two problems:
- Cartridge issue: low flow, cloudy water, odd taste or smell, cartridge past its rated capacity.
- Housing issue: visible cracks, persistent leaks, damaged threads, a housing that won’t seal no matter how it’s tightened.
Confusing the two leads to wasted money either way. Replacing a perfectly good housing when only the cartridge needs changing is unnecessary spending. Replacing only the cartridge in a cracked housing is a risk you shouldn’t take.
Signs Your Water Filter Housing Needs Replacement
Some warning signs are obvious. Others show up gradually, and it’s easy to explain them away as normal wear. Here are the signs that genuinely point to housing replacement rather than a simple cartridge swap or O-ring change.
- Visible cracks or hairline fractures, especially near the base or around the threads. These often widen once the housing is pressurized, even if they look minor when dry.
- Leaks that return after re-sealing. If you’ve replaced the O-ring, applied food-grade lubricant, and tightened correctly, and the leak comes back, the housing body or sealing surface is likely damaged.
- Damaged or stripped threads. Cross-threading, over-tightening, or age can wear down the threads until the cap no longer seats properly.
- Warping or an uneven shape, often from heat exposure, freezing, or long-term pressure stress.
- Brittle, chalky, or discolored plastic. UV exposure and chemical exposure break down plastic polymers over time, making the housing prone to sudden cracking.
- Corrosion on metal fittings or brass components, which can weaken connection points and cause slow leaks.
- Pressure-related damage, such as bulging, stress marks, or a housing that flexes visibly under normal line pressure.
- Difficulty opening or closing the housing, which can mean the threads or locking mechanism have deformed.
- Housing incompatibility with newer cartridges or fittings, common in older systems that have been partially upgraded over time.
- Age-related deterioration. Even undamaged housings lose structural reliability after long service life, particularly clear and transparent models exposed to sunlight.
If you notice one or two of these signs, a closer inspection is worth the ten minutes it takes. If you notice several at once, replacement is the safer decision.
What Causes Water Filter Housing Failure
Understanding the cause helps you avoid repeating the problem with the next housing. Most failures trace back to a handful of recurring issues.
Over-tightening is one of the most common causes of cracked filter housing threads. Hand-tight plus a small wrench turn is usually enough; forcing it further stresses the plastic at the exact point where it’s weakest.
Pressure spikes and water hammer put sudden stress on the housing walls, especially in systems without a pressure regulator. Repeated spikes cause microfractures that eventually turn into visible cracks.
UV exposure degrades clear and translucent plastics faster than opaque ones. A clear housing installed near a window or outdoors will typically show brittleness sooner than the same housing kept in a dark utility space.
Chemical exposure, temperature extremes, and simple age all play a role too. None of these causes are avoidable forever, which is why periodic inspection matters more than assuming a housing will last indefinitely.
Cartridge vs. Housing: A Quick Decision Table
| Situation | Replace Cartridge | Replace Housing |
|---|---|---|
| Cartridge is clogged or past its rated life | Yes | Usually no |
| Housing body is cracked | No | Yes |
| Housing leaks from damaged threads | No | Usually yes |
| O-ring is worn but housing is intact | Sometimes | Usually no |
| Housing is corroded or badly stained | No | Yes |
| Flow has slowed but housing looks fine | Yes | No |
| Leak returns after new O-ring and correct torque | No | Yes |
| Housing flexes or bulges under pressure | No | Yes |
Use this as a starting checklist, then confirm with a hands-on inspection before you order parts.
How to Check a Housing Before Deciding
A short inspection avoids guesswork. Shut off the water supply and relieve the pressure first, using the pressure release button if your system has one.
- Drain the housing and remove the cartridge.
- Wipe the housing dry and look closely along the threads, base, and sidewalls for cracks or stress lines.
- Check the O-ring groove for wear, flattening, or debris.
- Inspect the cap threads for stripping or rounding.
- Reassemble with a fresh, correctly lubricated O-ring and hand-tighten plus a slight wrench turn.
- Restore water pressure slowly and watch the housing for at least 30 minutes.
If the leak is gone, the O-ring was the problem. If it returns from the same spot, or if you found cracking during inspection, plan on replacing the housing.
Choosing the Right Replacement Housing
Once you’ve confirmed the housing needs replacing, the next decision is picking one that actually fits your system. A housing that looks similar isn’t automatically compatible.
Size and Port Compatibility
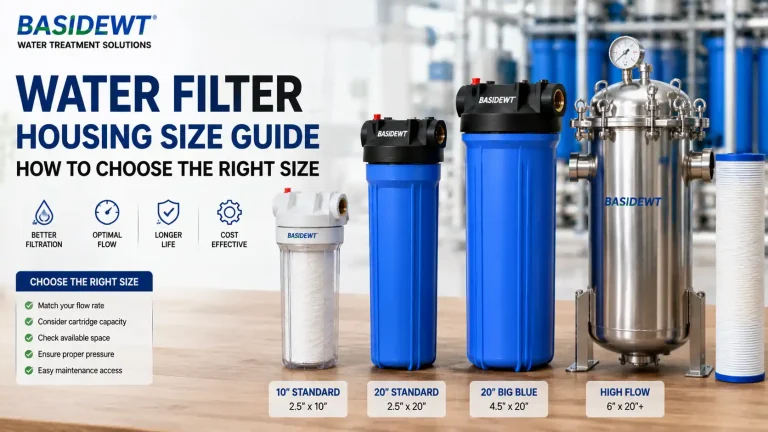
Match the housing size to your existing footprint and flow needs. Standard 10-inch housings suit most point-of-use setups, while larger households and commercial points often need bigger cartridges. If you’re unsure which size fits your situation, our comparison of 10-inch and 20-inch housings breaks down the practical differences.
Port size and thread type matter just as much as overall dimensions. A housing with the wrong inlet or outlet thread will leak no matter how carefully it’s installed, so confirm NPT sizing before ordering.
Cartridge Compatibility
Not every housing accepts every cartridge. Standard sump housings usually take universal cartridge sizes, but some proprietary systems use non-standard dimensions. Check the cartridge diameter and length against the housing’s rated capacity before buying.
Pressure Rating and Flow Requirements
Every housing carries a maximum working pressure rating. Installing a residential-rated housing in a commercial line running at higher pressure is a common and preventable mistake. Match the housing’s rated pressure and flow rate to your actual system conditions, with some margin for pressure fluctuation.
Material Selection
Housing material affects both durability and where it’s suitable for use. Reinforced or opaque plastics resist UV degradation better than fully clear ones, which makes them a better fit for outdoor or sunlit installations. Where transparency for cartridge visibility matters, a clear water filter housing is a reasonable trade-off, as long as it’s kept out of direct, prolonged sunlight.
Residential vs. Commercial Replacement Considerations
Residential replacements are usually straightforward. A single housing serves the point of use, pressure is moderate, and standard-size parts are widely available.
Commercial and industrial systems raise the stakes. Higher flow rates, continuous operation, and stricter uptime requirements mean a failed housing can disrupt production or service. In these settings, it’s worth keeping a compatible spare housing on hand and scheduling replacement proactively rather than waiting for a failure.
Standard vs. Big Blue Replacement Considerations
Whole-house and higher-capacity systems often use Big Blue housings rather than standard-size units. These larger housings handle greater flow volumes but also carry more water weight and pressure load, which makes structural integrity even more important.
If your current housing is a Big Blue unit and shows any of the warning signs covered earlier, don’t assume the larger size makes it more durable. Our guide to Big Blue housing sizes and applications explains where these units make sense and how to size a replacement correctly.
How to Replace a Water Filter Housing Safely
The general replacement process is similar across most residential and light commercial systems, though exact steps vary by model.
- Shut off the water supply and relieve system pressure.
- Disconnect the inlet and outlet fittings from the old housing.
- Remove the old housing bracket or mounting hardware.
- Position the new housing and reconnect fittings, using fresh thread tape where needed.
- Install the cartridge and secure the housing cap with a properly lubricated O-ring.
- Restore water pressure gradually and check every connection point for leaks.
This is a simplified overview. For the complete step-by-step process, including bracket mounting and torque guidance, see our full water filter housing installation guide.
Housing materials and pressure ratings are typically documented by manufacturers and industry sources; for readers who want a deeper technical reference on housing construction, this overview of water filter housing types is a useful starting point.
Common Replacement Mistakes to Avoid
A few mistakes show up repeatedly, and most are easy to prevent once you know to look for them.
- Buying by appearance instead of specification. Two housings can look nearly identical while using different thread standards or port sizes.
- Ignoring the pressure rating. A housing rated below your system’s operating pressure is a leak, or worse, waiting to happen.
- Over-tightening the new housing. This is the fastest way to crack a brand-new part during the very first installation.
- Reusing an old, worn O-ring to save a few dollars, which often causes an immediate leak in an otherwise correctly installed housing.
- Mixing old and new components from different manufacturers without confirming compatibility first.
When Professional Help Makes Sense
Straightforward point-of-use replacements are manageable for most homeowners with basic tools. Commercial installations, high-pressure systems, or situations involving soldered or hard-plumbed connections are better handled by a qualified installer. If you’re unsure about pressure ratings, thread standards, or local plumbing requirements, a short consultation before ordering parts can prevent a costly mistake.
For readers sourcing a replacement, browsing available water filter housing options alongside your system’s specifications makes it easier to match size, material, and pressure rating correctly the first time.
Conclusion
Water filter housing replacement comes down to one core question: is the housing itself damaged, or is it just the cartridge doing its job of catching contaminants? Cracks, persistent leaks, stripped threads, corrosion, and age-related brittleness all point to the housing. Reduced flow or changed taste, with an intact housing, usually just means it’s time for a new cartridge.
Before buying a replacement, check size, port compatibility, pressure rating, cartridge fit, and material suitability for where the housing will be installed. Getting these details right the first time avoids repeat leaks and wasted parts. When the housing has genuinely failed, replacing it promptly protects the rest of your filtration system from water damage and keeps your water quality consistent.
RELATED POSTS

How to Wash a Car Properly: The Complete Step-by-Step Guide
What is an FRP Tank?
why is my under sink water filter making noise
Why Choose a Whole House RO System? Benefits, Costs & Installation
Commercial UV Water Sterilizer: Applications, Benefits and Selection Guide