BasideWT- Whole Home Water Filtration System & Replacement



Water Filter Housing Installation Guide: Step-by-Step Process
A water filter housing installation only takes a few steps, but getting the sequence right is what separates a leak-free system from a callback visit. Whether you are fitting a single sediment housing under a kitchen sink or setting up a whole-house unit at the main supply line, the same core principles apply: confirm flow direction, prepare the connections, seat the cartridge correctly, and test before you walk away.
This guide walks through that entire process in order, from the planning stage to the final pressure check. It is written for homeowners doing a first DIY install, as well as plumbers, installers, and facility teams who need a clear reference for consistent results.
The Basic Installation Sequence at a Glance
Before diving into details, here is the general order most water filter housing installations follow:
- Turn off the water supply and relieve pressure.
- Choose and prepare the installation location.
- Confirm the inlet and outlet ports.
- Install shut-off valves and any required fittings.
- Mount the housing bracket securely.
- Insert the filter cartridge and check the O-ring.
- Connect the housing to the plumbing.
- Flush the system and check for leaks.
- Run a pressure test and final inspection.
Every housing model has its own specific instructions, so this sequence should be treated as a general framework rather than a universal rulebook. Manufacturer documentation always takes priority over general guidance like this.
Before You Start: Pre-Installation Planning
Good preparation prevents most installation problems. Rushing straight to the pipework is one of the most common causes of leaks and rework.
Checking the Water Supply and Pressure
Start by confirming your incoming water pressure. Most residential and light commercial water filter housings are rated for a working pressure between roughly 20 and 125 psi (1.4 to 8.6 bar), though this varies by model. Installing a housing on a supply line that regularly exceeds its rated pressure can stress the bowl, seals, and fittings over time.
If your building has unusually high or fluctuating pressure, a pressure-reducing valve upstream of the housing is worth considering. This single step avoids a large share of premature seal failures.
Choosing the Right Installation Location
Location affects both performance and long-term convenience. When selecting a spot, look for:
- Easy access for future filter changes
- Enough clearance below the housing to remove the bowl
- A stable, vertical mounting surface
- Protection from freezing temperatures
- Proximity to a drain or floor drain, in case of spills during servicing
For whole-house systems, installation typically happens right after the main shut-off valve and water meter, before the line branches out to fixtures. For point-of-use setups, installation usually happens under a sink or near a specific appliance. If you are still deciding between housing configurations for your property, the complete beginner’s guide to water filter housings explains how different housing types are typically positioned.
Tools and Materials You Will Need
Having everything ready before you begin keeps the installation efficient. A typical toolkit includes:
| Item | Purpose |
|---|---|
| Adjustable wrench or housing wrench | Tightening and loosening the housing bowl |
| Teflon tape or thread sealant | Sealing threaded pipe connections |
| Pipe cutter or tubing cutter | Cutting supply lines to length |
| Shut-off valves | Isolating the housing for maintenance |
| Mounting bracket and screws | Securing the housing to a wall or frame |
| Bucket or towel | Catching residual water during installation |
| Replacement O-ring (if not included) | Ensuring a proper seal on the housing bowl |
Skipping thread sealant or using a damaged O-ring are two of the fastest ways to end up with a slow leak that only shows up days later.
Understanding Inlet and Outlet Before You Connect Anything
Connecting the housing backward is probably the single most common installation mistake, and it is also the easiest one to avoid. Most water filter housings have the inlet and outlet ports clearly marked, usually with arrows molded into the housing head or labeled “IN” and “OUT.”
Water should always flow from the inlet, through the filter cartridge, and out through the outlet. If the arrows are not visible, trace the intended flow direction using the manufacturer’s diagram rather than guessing. Reversing the connection does not just reduce filtration performance; on some housing designs, it can also cause the cartridge to shift out of position or bypass filtration entirely.
For a broader explanation of how water actually moves through the housing internally, the article on how a water filter housing works covers the mechanics in more depth.
Step-by-Step Water Filter Housing Installation
With planning complete, the actual installation follows a fairly consistent sequence across most housing types.
Step 1: Shut Off the Water and Relieve Pressure
Close the main shut-off valve or the isolation valve for the section you are working on. Open a nearby faucet briefly to release residual pressure in the line. This prevents water from spraying out when you cut into the pipe or open a fitting.
Step 2: Mount the Housing Bracket
Attach the mounting bracket to a solid surface using appropriate screws or anchors. The housing should sit level, with enough room below it to remove the sump or bowl for future cartridge changes. A crooked mount puts uneven stress on the fittings once water pressure is restored.
Step 3: Prepare the Fittings and Shut-Off Valves
Install shut-off valves on both the inlet and outlet sides if they are not already present. This lets you isolate the housing for future maintenance without shutting off water to the entire building. Wrap threaded connections with two to three layers of Teflon tape, applied in the direction of the threads, and apply thread sealant where recommended by the manufacturer.
Step 4: Insert the Filter Cartridge
Before attaching the bowl, check the O-ring at the top of the sump. It should sit smoothly in its groove without twisting, cuts, or debris. A light coating of food-grade silicone lubricant, if permitted by the manufacturer, helps the O-ring seat evenly and makes future bowl removal easier.
Place the filter cartridge into the housing bowl, centering it on the base support. Then thread the bowl onto the housing head by hand first, followed by a firm quarter-turn with a housing wrench. Overtightening can crack the bowl or deform the O-ring, so avoid using excessive force.
Step 5: Connect the Housing to the Plumbing
Connect the inlet side of the housing to the supply line, followed by the outlet side. Support the housing head so that torque from tightening fittings does not stress the mounting bracket. For push-fit or compression fittings, make sure the tubing is cut cleanly and inserted fully before tightening.
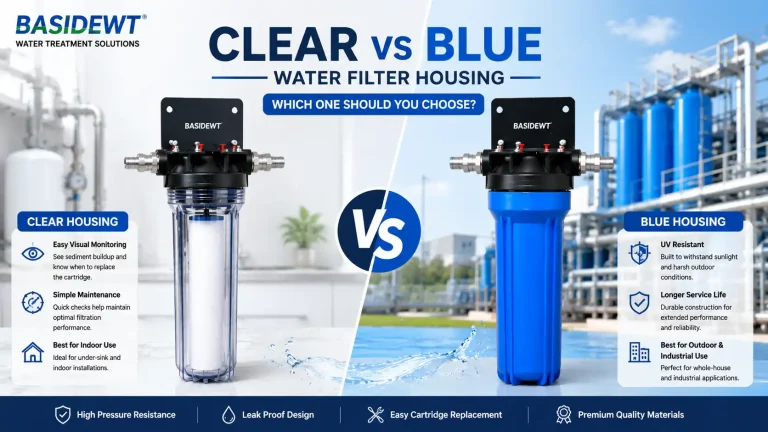
Housings that use a clear sump, rather than an opaque one, allow a visual check of the cartridge without opening the unit. If you’re deciding between a standard and a clear-bowl housing for easier monitoring, the guide on clear water filter housing options explains where each type works best.
Step 6: Open the Shut-Off Valves Slowly
Open the inlet valve first, slowly, to allow air to escape through the outlet side rather than building up pressure suddenly. Then open the outlet valve. Sudden full-pressure openings can cause water hammer, which stresses fittings and can loosen a freshly tightened bowl.
Flushing and Leak Testing
Once water is flowing, do not consider the job finished yet. This stage catches most installation errors before they become bigger problems.
Initial System Flush
New cartridges often release fine carbon dust or manufacturing residue during their first few minutes of use. Run water through an open faucet downstream for several minutes, following the cartridge manufacturer’s flushing recommendation. This clears loose particles and confirms that water is moving through the system in the correct direction.
Checking for Leaks
With water flowing, inspect every connection point carefully:
- Inlet and outlet fitting joints
- The seam where the bowl meets the housing head
- Any compression fittings or push connectors
- Shut-off valve bodies
A dry paper towel run along each joint will reveal even small drips that are hard to see by eye. If you find a leak at the bowl seam, shut off the water, release pressure, and check the O-ring for pinching or debris before reassembling.
Pressure Testing and Final Inspection
After confirming there are no visible leaks, let the system run under normal household or facility pressure for at least 24 hours before considering the installation complete. Slow leaks sometimes only appear once the housing has been under sustained pressure and minor vibration from daily use.
Pressure and supply reliability vary significantly by region and building age, which is one reason installers should always verify actual site conditions rather than assuming a standard pressure figure. Organizations such as the China Urban Water Association publish general information on urban water supply conditions that can be a useful reference point when planning installations across different city infrastructures.
During the final inspection, confirm the following:
| Check | What to Look For |
|---|---|
| Flow direction | Water enters at “IN” and exits at “OUT” |
| Bowl seal | No moisture at the bowl-to-head seam |
| Fitting tightness | No drips at threaded or compression joints |
| Bracket stability | Housing does not wobble under pressure |
| Water clarity | No cartridge debris in the flushed water |
Common Installation Mistakes and How to Avoid Them
Most water filter housing problems trace back to a small number of recurring mistakes.
| Common Mistake | Practical Solution |
|---|---|
| Connecting inlet and outlet backward | Always confirm flow-direction arrows before connecting fittings |
| Skipping thread sealant | Apply Teflon tape or approved sealant to every threaded joint |
| Overtightening the housing bowl | Hand-tighten first, then use a wrench for a firm final quarter-turn only |
| Damaged or misaligned O-ring | Inspect the O-ring before every installation and lubricate lightly if allowed |
| Opening valves too quickly | Open the inlet valve slowly to avoid water hammer |
| No isolation valves installed | Add shut-off valves on both sides for easier future servicing |
| Mounting on an unstable surface | Use a solid wall or frame with proper anchors |
Residential vs. Commercial Installation Considerations
Residential and commercial installations share the same fundamentals, but the scale and requirements differ.
| Factor | Residential Installation | Commercial Installation |
|---|---|---|
| Typical housing size | Single 10″ or 20″ housing | Multiple housings or Big Blue-style units |
| Access requirements | Under-sink or utility area | Dedicated mechanical room access |
| Pressure demands | Standard municipal pressure | Often higher flow and pressure demand |
| Documentation | Basic manufacturer instructions | Compliance with facility plumbing codes |
| Maintenance access | Occasional homeowner access | Scheduled maintenance by facility staff |
For larger residential or light commercial setups that need higher flow capacity, whole-house configurations often rely on larger housing formats. The comparison in the Big Blue water filter housing guide is useful context if your installation involves higher-capacity units rather than a standard single housing.
Safety Precautions During Installation
A few safety habits reduce risk during the installation process:
- Always depressurize the line before opening any fitting.
- Wear eye protection when cutting pipe or tubing.
- Support the housing weight during mounting; a filled housing is heavier than an empty one.
- Keep electrical outlets and wiring away from the installation area if working near a utility room.
- Avoid forcing fittings that do not thread smoothly, since cross-threading damages both the fitting and the housing port.
When Professional Installation Is the Better Choice
DIY installation works well for straightforward point-of-use housings with standard fittings. However, professional installation is generally the safer choice for:
- Whole-house systems tied directly into the main supply line
- Commercial or industrial installations with code compliance requirements
- Properties with unusual pipe materials, such as older galvanized plumbing
- Situations involving high pressure, high flow rate, or multiple housing units
- Installations that must meet specific facility or insurance documentation standards
A licensed plumber or a qualified installer can also confirm that the housing matches your pipe size, flow rate, and pressure conditions, which reduces the risk of an install that technically works today but fails prematurely.
Conclusion
A successful water filter housing installation comes down to a handful of details done correctly: confirming flow direction, sealing every threaded connection, seating the O-ring properly, and testing thoroughly before considering the job complete. Skipping any one of these steps is usually where leaks, reduced performance, or premature part failure comes from.
Before you finish, double-check your connections, verify there is no residual moisture around the bowl seal, and confirm the system holds steady pressure over the following day. Every housing model has its own specifications, so always cross-reference this general process with your manufacturer’s instructions.
If you are still choosing the right unit for your property, BasideWT’s range of water filter housings covers residential, commercial, and industrial configurations, and our complete water filter housing buying and installation guide is a useful next stop for anyone comparing sizes and materials before purchase.
RELATED POSTS
Industrial UV Water Sterilizer: Applications and Selection Guide
RO Membrane Compatibility: How to Match a Membrane With Your System
How to Clean a Reverse Osmosis System: A Step-by-Step Guide for Maintenance
RO Membrane Troubleshooting: Low Flow, High TDS & Common Problems
RO Water System Membrane Guide: Types, Lifespan, Replacement & Maintenance