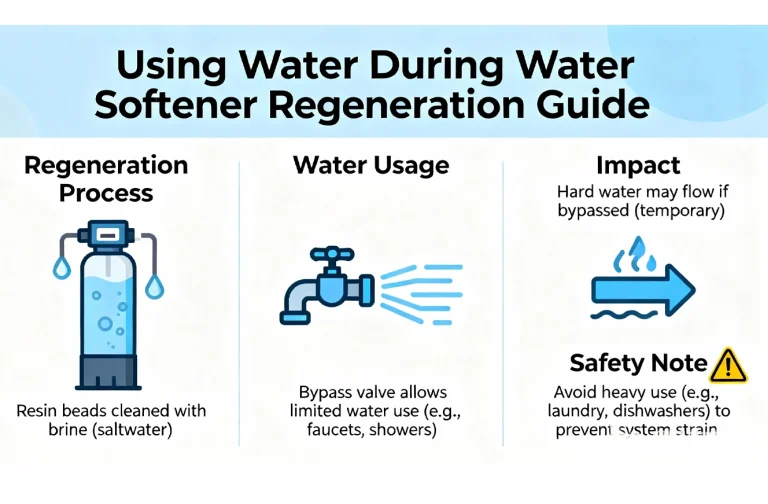
BasideWT- Whole Home Water Filtration System & Replacement


Ro Membrane Change
Performing a RO membrane change is the most critical maintenance task for your reverse osmosis system. Over time, the membrane’s ability to filter out contaminants diminishes, directly impacting your water quality and system efficiency. This guide provides clear, step-by-step instructions to help you confidently and safely complete this essential RO membrane change, ensuring your system continues to deliver clean, great-tasting water. Following the correct procedure protects your investment and restores your RO system to peak performance.
1.Clear a workspace under the sink near the RO system location.
2.Shut off the water supply to the RO system:
- Close the ball valve on the water line, or
- Turn the angle-stop feed valve clockwise (if present, it is typically on the wall under the kitchen sink near the RO unit).
- Also close the valve leading to the refrigerator if your system includes a refrigerator connection kit.
3.Close the reserve tank valve on top of the tank. When closed, the blue handle will be perpendicular to the water line.
4.Depressurize the system:
- Lift and lock the handle of the RO faucet to allow water to flow until it stops (this should happen within seconds if the water is shut off correctly).
- If water continues to flow, repeat Steps 2 and 3.
- Once depressurized, leave the RO faucet handle in the open position.
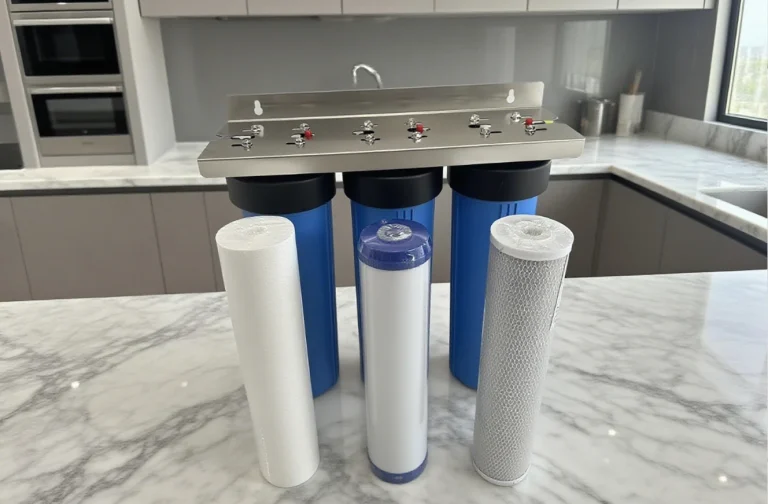
5.Gently pull the RO unit off its mounting clips and lay it on a towel.
6.Remove the tubing from the membrane housing cap’s push-to-connect fitting:
- Press down the seal ring with your thumb and forefinger while pulling the tubing out. Some resistance is normal.
- Important: This step can only be done after the system is fully depressurized (Step 4).
- If your system uses plastic nuts instead of push fittings, unscrew them.
7.Unscrew the membrane housing cap. Use pliers to pull out the old membrane by the white nipple at the top.
- Note the position of the rubber brine seal near the top of the old membrane for proper reinstallation.
- Discard the old membrane.
8.Wipe the inside of the housing with a clean cloth dampened with a chlorine bleach solution (10% bleach, 90% water).
Rinse thoroughly and allow to air dry completely.
9.Install the new membrane:
- Remove the new membrane from its packaging, handling it only by the white nipple. Do not touch any other part.
- Insert it into the housing until the white nipple is flush with the housing opening.
- You may gently twist or press the nipple against a flat surface to seat it fully.
- Reattach and tighten the housing cap.
- Reinsert the tubing about ¼ inch into the push-to-connect fitting, then pull back gently to secure.
10.Remount the RO unit. Restore water supply slowly in this order:
- Open the main water valve to the RO system.
- Open the refrigerator valve (if applicable).
- Then slowly open the tank valve.
- Caution: Rapid repressurization can damage the system.
- It may take up to 20 minutes for water to flow from the RO faucet. Let it run until the stream becomes a thin, steady flow or fast drip.
- Close the RO faucet and allow the system to sit for 3–10 hours.