BasideWT- Whole Home Water Filtration System & Replacement



How to Replace a Water Filter Housing: Step-by-Step Installation Guide
Learning how to replace a water filter housing is easier than most homeowners expect, as long as you follow the right sequence. A cracked housing, a stripped thread, or a persistent leak usually means the unit has reached the end of its service life. Instead of calling a technician for every replacement, you can handle the job yourself with a few basic tools and about thirty minutes of your time.
This guide walks you through the entire process, from spotting the warning signs to tightening the final connection. Whether you manage a single residential system or a bank of industrial units, the same core principles apply. By the end, you will know exactly how to replace a water filter housing safely, without damaging your plumbing or voiding your cartridge warranty.
When Should You Replace a Water Filter Housing?
Not every problem calls for a full replacement. Sometimes a worn O-ring or a loose cap is the real culprit. However, certain signs point clearly toward a new housing rather than a repair.
Look for visible cracks along the housing wall, especially near the threads. Cracks often start small and expand under water pressure, so catching them early prevents a bigger mess later. Cloudy or brittle plastic is another warning sign, particularly in units exposed to sunlight or fluctuating temperatures.
Persistent leaks around the base, even after replacing the O-ring, usually mean the sealing surface itself is damaged. Meanwhile, stripped threads or a housing that will not seat properly against the cap are mechanical failures that no amount of lubricant can fix. If you have already reviewed our breakdown of common water filter housing problems, causes, and solutions, you already know that some issues are preventable, but structural damage rarely is.
Age matters too. Most residential housings last between five and ten years, depending on water quality and usage. Once a unit shows two or more of these signs together, replacement becomes the safer, more cost-effective choice.
Tools and Materials You’ll Need
Gathering everything beforehand saves time and prevents mid-job trips to the hardware store. Here is what a typical housing replacement requires:
- Filter wrench – for gripping and turning the housing without cracking the plastic
- New housing – matched to your existing plumbing size and cartridge type
- Replacement cartridge – installed fresh alongside the new housing
- O-ring – sized correctly for a watertight seal
- Silicone lubricant – never petroleum-based, which can degrade rubber seals
- Towel – to catch residual water during disassembly
- Bucket – placed underneath to collect drips and prevent floor damage
A quality filter wrench makes the biggest difference in how smoothly this job goes. Cheap wrenches slip under torque and can crack aging plastic housings. If you do not already own one, our water filter wrench is built specifically for this kind of removal and installation work.
How to Replace a Water Filter Housing Step by Step
This section covers the full replacement sequence in order. Follow each step carefully, and do not skip the pressure release stage, since that is where most mistakes happen.
Step 1: Turn Off the Water Supply
Locate the shutoff valve feeding your filtration system and close it completely. For whole house systems, this is often the main line valve near the water meter or pressure tank. Confirm the valve is fully closed before moving forward.
Step 2: Release System Pressure
Most modern housings include a pressure relief button on the cap. Press it firmly until the hissing stops and water flow ceases. This step matters because a pressurized housing can spray water forcefully when opened, which surprises even experienced installers.
If your unit has no pressure relief button, open a downstream faucet instead. This allows trapped water pressure to bleed off gradually and safely.
Step 3: Remove the Old Housing
Attach your filter wrench to the housing sump and turn it counterclockwise. Older units sometimes resist due to mineral buildup or over-tightening from a previous installation. Apply steady, even pressure rather than sudden force, since jerking the wrench can crack brittle plastic.
Once loose, unscrew the housing by hand and lower it slowly. Residual water will spill out, so keep your bucket and towel within reach.
Step 4: Inspect Fittings and O-Ring
Before installing anything new, examine the cap threads, the inlet and outlet fittings, and the mounting bracket for damage. Corrosion, cracks, or worn threads here can undermine even a brand-new housing.
Check the old O-ring for flattening, cracking, or a brittle texture. Even if you plan to reuse the cap, always install a fresh O-ring during a housing replacement. This small part is responsible for the entire seal, and it costs far less than a callback for a leaking connection.
Step 5: Install the New Housing
Coat the new O-ring lightly with silicone lubricant before seating it into its groove. This lubricant allows the ring to slide smoothly during assembly and reduces the risk of pinching or tearing.
Align the new housing beneath the cap, making sure the threads engage evenly. Cross-threading at this stage is a common mistake, so start turning by hand until you feel the threads catch naturally.
Step 6: Install the Cartridge Correctly
Cartridge alignment matters more than many installers realize. Insert the cartridge into the housing sump with the correct end facing up, following the arrow or flow indicator printed on most models. A misaligned cartridge can reduce filtration efficiency or allow unfiltered water to bypass the media entirely.
Before choosing a replacement cartridge, confirm it matches your housing’s dimensions and thread pattern. Our water filter housing size guide explains how mismatched sizing leads to poor seating and premature wear.
Step 7: Tighten Properly
Thread the housing back onto the cap by hand first, turning it as far as it will comfortably go. Then use the filter wrench to add a final quarter to half turn of tightening torque.
Overtightening is one of the most frequent causes of cracked housings, so resist the urge to force it further. If the housing feels snug and the O-ring is properly seated, that is usually sufficient.
Step 8: Restore Water Supply
Slowly reopen the main shutoff valve. Sudden pressure surges can stress new connections, so a gradual opening protects your fresh seal. Listen for hissing or unusual sounds as pressure builds inside the system.
Step 9: Leak Testing
Inspect every connection point closely for the first few minutes after restoring pressure. Wipe the housing exterior dry, then check again after five minutes. A dry housing after this window generally confirms a proper seal.
Water pressure plays a major role in leak testing accuracy, since systems running above their rated pressure can reveal weak seals that lower pressure would mask. If you are unsure about your system’s rating, our article on water filter housing pressure ratings explains how to match housings to your incoming line pressure safely.
Step 10: Final Inspection
Once the system passes the leak test, check the cartridge indicator, confirm normal water flow at a nearby faucet, and record the installation date. Many installers write the date directly on the housing with a permanent marker, which simplifies future maintenance scheduling.
Common Installation Mistakes to Avoid
Even straightforward jobs go wrong when small details get overlooked. These mistakes appear most often during DIY replacements:
Skipping the O-ring lubrication step is a frequent error. A dry O-ring can twist or pinch during assembly, creating a slow leak that only appears days later. Silicone lubricant takes seconds to apply and prevents this entirely.
Overtightening the housing is another common issue. Installers sometimes assume that tighter means safer, but excessive force stresses the threads and can crack the sump under pressure.
Ignoring thread protection during removal also causes problems. Dragging a wrench across exposed threads can nick the plastic, weakening the connection point permanently. Always support the housing evenly while applying torque.
Finally, mismatched cartridge compatibility trips up many first-time installers. A cartridge that is slightly too short or too narrow will not seat correctly, even inside a properly installed housing. Always verify compatibility before you begin.
Safety Tips During Replacement
Water filtration systems carry stored pressure, so treat every housing as pressurized until proven otherwise. Always release pressure through the relief button or a downstream faucet before loosening any fitting.
Wear eye protection when working underneath sinks or in tight utility spaces, since residual water can spray unexpectedly. Keep electrical outlets and cords away from your work area if you are servicing a unit near a water heater or pump.
Never use metal tools directly against plastic housings without the correct grip attachment. A dedicated filter wrench distributes pressure evenly, while pliers or pipe wrenches concentrate force in ways that crack plastic sumps.
Replacing Whole House vs Industrial Water Filter Housings
The core replacement steps stay consistent across residential and industrial systems, but scale and complexity differ significantly. Whole house units typically involve a single housing and moderate pressure, while industrial systems often include multiple housings, higher flow rates, and stricter compliance requirements.
| Factor | Whole House Housing | Industrial Housing |
|---|---|---|
| Typical size | Single or dual cartridge | Multi-cartridge or bank systems |
| Operating pressure | 40–80 PSI | Often 100+ PSI |
| Replacement frequency | Every 6–12 months for cartridges | Scheduled maintenance intervals |
| Tools required | Basic filter wrench | Industrial-grade wrenches, lockout procedures |
| Downtime tolerance | Minimal disruption | Requires planned shutdown windows |
| Personnel | Homeowner or technician | Trained maintenance staff |
If you manage a residential property, our guide to whole house water filter housing systems covers sizing and installation basics in more depth.
For facilities managers overseeing larger systems, our industrial water filter housing selection guide explains how application, flow demand, and compliance standards shape the right choice.
Industrial replacements also demand closer attention to sequencing. Because multiple housings often share a manifold, technicians must isolate individual units without disrupting the entire line. This is rarely necessary in residential settings, where a single shutoff valve handles the whole job.
How Often Should a Water Filter Housing Be Replaced?
Housings last considerably longer than the cartridges inside them, but they are not permanent. Most residential units perform reliably for five to ten years under normal conditions. Industrial housings, depending on material and duty cycle, can last longer if properly maintained.
Water quality accelerates or delays this timeline. Hard water, high chlorine content, and frequent pressure fluctuations all shorten housing lifespan. Meanwhile, following a consistent replacement schedule, alongside routine maintenance, extends service life considerably. Our water filter housing maintenance guide outlines the preventive steps that keep housings performing well between full replacements.
As a general rule, inspect your housing visually every time you change the cartridge. This habit catches early cracking or discoloration before it becomes a leak.
Expert Recommendations
Experienced technicians generally agree on a few best practices. First, always replace the O-ring during any housing swap, even if the old one looks fine. The cost is minimal compared to the risk of a slow leak.
Second, keep a spare housing on hand if your system supports critical operations, such as a commercial kitchen or a facility with continuous water demand. This avoids downtime while waiting for a replacement part to arrive.
Third, document every replacement with the date and cartridge type installed. This record simplifies future maintenance and helps you spot patterns, such as a housing that fails prematurely due to unusually hard water.
Finally, when in doubt about compatibility or pressure ratings, consult manufacturer specifications rather than guessing. Mismatched components are one of the leading causes of premature failure across both residential and industrial systems.
Final Thoughts
Knowing how to replace a water filter housing gives you the confidence to handle a common maintenance task without unnecessary delays or service calls. The process follows a logical sequence: shut off the water, release pressure, remove the old unit, inspect the fittings, and install the new housing with a properly lubricated O-ring.
Whether you are servicing a single residential unit or coordinating replacements across an industrial facility, careful attention to thread alignment, cartridge compatibility, and leak testing makes the difference between a lasting repair and a repeat callback. With the right tools and a methodical approach, replacing a water filter housing becomes a routine part of keeping your water system reliable.
For a deeper technical reference on housing installation and pressurized vessel handling, Parker Hannifin’s technical instructions for filter housing installation and safe use offer useful guidance on safe assembly practices across housing types.
RELATED POSTS
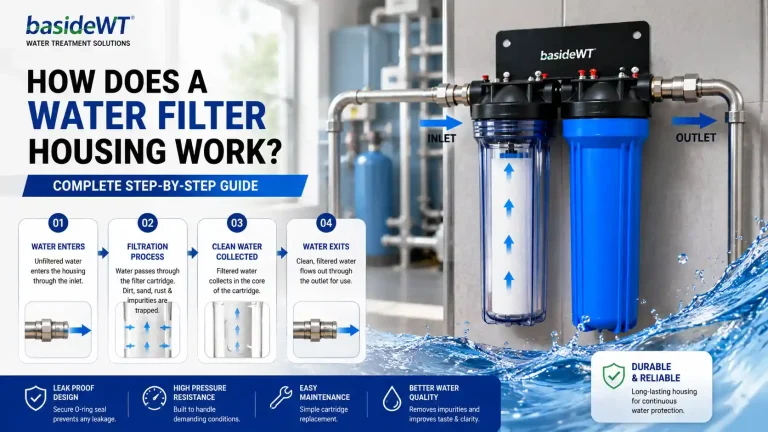
How Does a Water Filter Housing Work? Complete Step-by-Step Guide
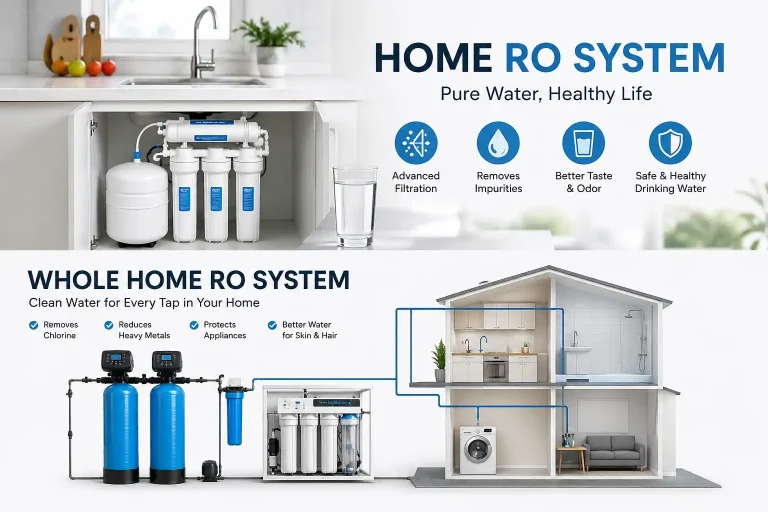
Home RO System: A Complete Guide to Clean and Safe Drinking Water at Home

Deionized Water System: The Complete Guide for Car Wash, Window Cleaning & Industrial Use

Types of RO Membranes: Complete Guide to Choosing the Right Type

How to Change a Water Filter Cartridge: Your Ultimate DIY Guide for Cleaner Water