BasideWT- Whole Home Water Filtration System & Replacement


Water Fed Pole System Setup: A Complete Equipment and Connection Guide
A water fed pole system only works well when every part of it is connected correctly. Getting a water fed pole system setup right means understanding how water moves from the source, through purification, and out through the brush at the top of the pole. When one connection is wrong, or one stage is skipped, the whole job suffers. Windows come out streaky, the pump struggles, or the pole simply does not deliver enough water.
This guide walks through a complete water fed pole system setup from start to finish. It covers the water source, the purification stage, the pump and tank, the hose, the pole, and the brush. It also explains how to check water flow and water purity before starting a cleaning job, and how setups differ between portable kits and larger professional systems.
What a Complete Water Fed Pole System Setup Includes
A typical water fed pole cleaning system setup has five functional stages:
- Water source – tap water, a static tank, or another supply
- Purification stage – filters, RO membranes, DI resin, or a combination
- Water delivery stage – a pump, a tank, or gravity feed
- Hose and pole – carries pure water up to the cleaning head
- Brush – applies water and agitates dirt on the surface
Not every setup uses all five stages in the same way. A small portable kit might skip a storage tank entirely. A van-mounted commercial system might include a large RO/DI unit, a bulk tank, and a powerful pump. The core idea stays the same across every configuration: water starts untreated, gets purified, then travels to the pole and brush with enough flow and pressure to clean effectively.
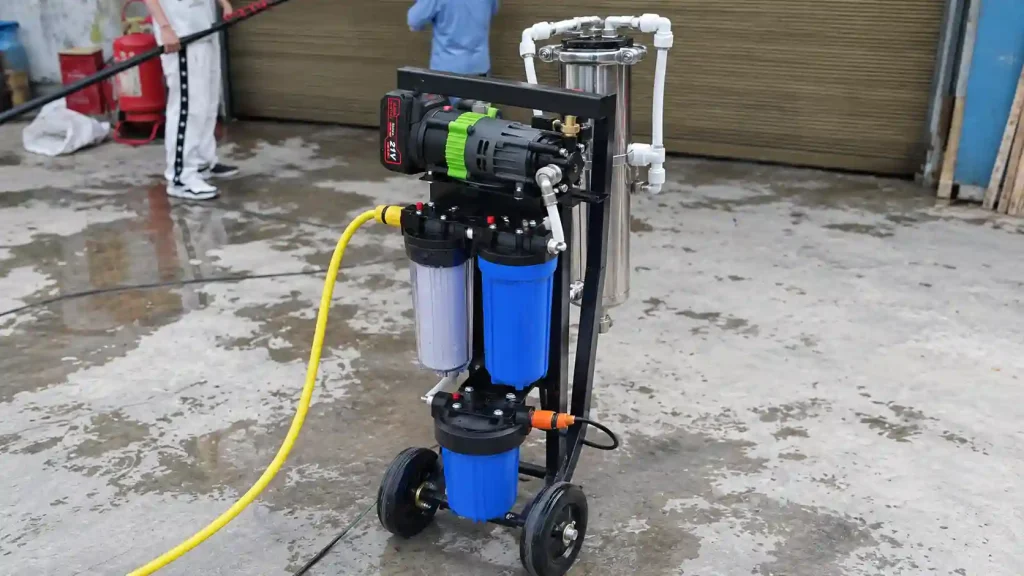
For a broader look at how these components fit together, this complete water fed pole system guide covers the full picture. This article focuses specifically on the setup and connection process.
Understanding the Basic Water Flow
Before connecting anything, it helps to picture how water actually travels through the system.
Water enters from the source, usually a tap, hose bib, or a filled tank. It then passes through one or more purification stages that strip out dissolved minerals. Purified water either flows directly into the hose under source pressure, or it collects in a tank and gets pushed forward by a pump. From there, it travels through the hose, up the length of the pole, and out through the brush onto the glass.
Each connection point along this path needs to be secure and sized correctly. A loose fitting anywhere in the chain can drop water pressure, introduce air, or cause leaks that waste purified water. If you want to understand how a water fed pole works in more mechanical detail, that background can make troubleshooting easier later.
Preparing the Water Source
Every setup starts with a water source. In most cases, this is a standard tap or outdoor spigot. Some professional setups instead draw from an onboard tank filled in advance, which is useful when a job site has no accessible tap.
Before connecting anything, check the following:
- The tap or source has steady pressure and no visible leaks
- Any adapter fittings match the thread type of your hose
- The source water is reasonably clear, without heavy sediment
Source water quality varies by location. Harder water, with more dissolved minerals, puts more demand on the purification stage. This does not usually change how you physically connect the system, but it can affect how often filters or resin need attention later.
Connecting Purification Equipment
The purification stage is where source water becomes pure water suitable for spot-free cleaning. Depending on the system, this stage might include:
- A sediment or carbon pre-filter
- A reverse osmosis (RO) membrane
- A deionization (DI) resin vessel
- A combination RO/DI unit
Connect the pre-filter first, closest to the water source. This protects the more sensitive RO membrane or resin from sediment and chlorine damage. Water then flows from the pre-filter into the RO stage, if the system includes one, and finally through the DI resin vessel for final polishing.
Each stage connects with quick-connect fittings or threaded unions, depending on the equipment. Make sure O-rings and seals sit properly before tightening, since a poor seal at this stage can let untreated water bypass purification entirely.
Not every system needs every stage. Some setups use resin only, especially where source water already has relatively low mineral content. Others rely on a full RO/DI combination for consistently pure output. The right configuration depends on your source water and how many windows you plan to clean before servicing the filters. For equipment options at this stage, this water fed pole equipment guide breaks down common purification components in more detail.
Connecting the Tank and Pump (Where Applicable)
Some water fed pole system setups draw water directly from the tap, through purification, and straight into the hose. Others store purified water in a tank first, then use a pump to push it through the hose and up the pole.
A tank and pump combination is common when:
- Job sites lack reliable tap access
- The cleaning job requires higher flow than gravity or tap pressure can provide
- Multiple poles or a longer hose run need consistent pressure
If your setup includes a tank, connect the purification outlet directly into the tank’s inlet fitting. Then connect the pump’s intake line to the tank’s outlet, and the pump’s discharge line to the hose. Secure all hose clamps at these joints, since pump pressure can push loose connections apart.
If your setup skips the tank, purified water usually flows straight from the DI stage into the pump inlet, or directly into the hose if relying on mains pressure alone. Check your specific pump’s rated flow and pressure to avoid running it dry or overloading the hose.
Connecting the Water Hose
The hose carries pure water from the pump, tank, or purification unit up to the pole. A few setup details matter here:
- Match hose diameter to the fittings on both ends; forcing a mismatched connection strains the fitting and can cause leaks
- Keep hose length reasonable for the job; excess length increases friction loss and reduces flow at the brush
- Route the hose to avoid sharp bends, which restrict flow and wear out the hose faster over time
Screw or clip the hose securely at the pump or tank end first, then run it out to where the pole will be positioned. Avoid letting the hose drag across rough surfaces, since abrasion can wear through the outer layer over time.
Connecting the Water Fed Pole
With the hose in place, connect it to the base of the telescopic water fed pole. Most poles have a dedicated inlet fitting near the base, designed to accept a threaded or push-fit hose connector.
Extend the pole to a comfortable working length before locking the sections. Working with the pole fully extended before checking connections helps confirm there are no leaks along its length, since internal tubing runs the full height of the pole to feed the brush.
Check that each telescopic section locks firmly. A section that slips during use can suddenly drop water pressure at the brush or, in more physical terms, cause the pole to lose the height you need mid-job.
Attaching and Preparing the Brush
The brush sits at the top of the pole and does two jobs: it delivers water onto the surface and agitates dirt loose through its bristles.
To attach the brush:
- Screw or clip the brush head onto the pole’s top fitting
- Confirm the internal water channel lines up with the pole’s water feed
- Check that bristles are clean and undamaged before use
Rinse the brush briefly before the first job of the day. This clears out any dust or residue that settled in the bristles since the last use, so it does not transfer onto the glass during cleaning. This is the same agitation-and-rinse principle behind the water fed pole cleaning method as a whole, applied at the setup stage before any glass gets touched.
Checking Water Flow
Once every connection is in place, turn the system on and check flow before starting any cleaning work.
Look for:
- Steady, consistent flow at the brush, without sputtering
- No visible leaks at hose connections, the pump, or the pole base
- Even distribution across the width of the brush, not just from one side
If flow seems weak, work back through the system in order: check the source pressure, then the purification stage for a clogged filter, then the pump for airlock or intake issues, then the hose for kinks or restrictions. Weak flow almost always traces back to one restriction point rather than a fault across the whole system.
Checking Water Purity Before Cleaning
Flow alone does not confirm the water is pure enough for spot-free results. Before starting a job, test the water with a TDS meter at the brush end of the pole.
TDS, or total dissolved solids, measures the concentration of minerals left in the water. Lower readings generally mean the water will dry without leaving visible spots. If the reading is higher than expected, it usually points to exhausted resin or a failing RO membrane rather than a connection problem.
A TDS meter is a standard part of a professional setup checklist, since checking water quality on-site takes only a few seconds and prevents a wasted trip if the purification stage needs attention.
Step-by-Step First-Time Setup Process
For a first-time water fed pole setup, work through the stages in this order:
- Connect the water source to the pre-filter or first purification stage
- Connect subsequent purification stages (RO, then DI, if both are present)
- Connect the purification outlet to the tank, if the system uses one
- Connect the pump intake to the tank outlet, and the pump discharge to the hose
- Connect the hose to the base of the pole
- Extend the pole and lock each section
- Attach the brush to the top of the pole
- Turn on the water source and check for leaks at every connection
- Check flow at the brush
- Test water purity with a TDS meter
- Adjust or troubleshoot any stage before starting the cleaning job
Working through these steps in sequence, rather than connecting components in random order, makes it far easier to spot which joint is leaking or which stage is restricting flow.
Portable Versus Professional Setup Differences
| Setup Type | Typical Components | Setup Consideration |
|---|---|---|
| Portable/backpack | Small resin vessel, gravity or hand-pump feed, short hose | Fast to assemble; limited water volume, so plan around job size |
| Van-mounted / commercial | RO/DI unit, bulk tank, 12V or mains pump, long hose reel | More setup steps; higher flow and pressure need extra attention to fittings and hose routing |
A portable setup usually connects in minutes, with fewer stages to check. A commercial van-mounted window cleaning systems setup takes longer to assemble but supports far more cleaning before the tank needs refilling or filters need attention.
Setup Considerations for Different Cleaning Environments
The environment you are cleaning in can change small details of the setup, even though the core connection sequence stays the same.
- Ground-floor and low-rise buildings: A shorter pole and hose run keep the setup simple, and a portable system is often sufficient.
- Multi-story buildings: Longer hose runs and taller poles increase friction loss, so a pump with adequate pressure becomes more important.
- Sites without tap access: A filled tank connected ahead of the purification stage, or a pre-filled pure water tank, replaces the tap connection.
- Hard water areas: Expect the purification stage to need more frequent attention, since more dissolved minerals pass through the resin or membrane.
None of these situations change how the pole, hose, and brush connect to each other. They mainly affect how much purification capacity and pump power the setup needs.
Common Water Fed Pole Setup Mistakes
A few setup mistakes come up repeatedly, even with experienced cleaners:
- Skipping the pre-filter check, letting sediment shorten the life of an RO membrane or resin
- Using mismatched hose fittings, which leak under pressure even when hand-tightened firmly
- Extending the pole before checking connections, making it harder to spot a leak near the base
- Ignoring TDS readings, and only noticing spotting after the windows have dried
- Overlooking pump priming, which can cause a pump to run dry and wear out faster
- Coiling the hose too tightly during storage, which weakens it at bend points over time
Most of these mistakes are easy to prevent with a quick check before starting each job, rather than assuming the setup from the previous job is still correct.
Final Pre-Cleaning Setup Checklist
Before starting any job, confirm the following:
- [ ] All hose and pole connections are tight and leak-free
- [ ] Purification stage is delivering water within an acceptable TDS range
- [ ] Pump is primed and running smoothly, if the setup includes one
- [ ] Pole sections lock securely at the working height
- [ ] Brush is clean, undamaged, and properly attached
- [ ] Water flow at the brush is steady and even
- [ ] Hose is routed to avoid sharp bends or trip hazards
Running through this list takes only a few minutes but catches most setup problems before they turn into a wasted trip or a streaky finish.
Conclusion
A reliable water fed pole system setup comes down to following the water path in order: source, purification, delivery, hose, pole, and brush. Each connection matters, and checking flow and water purity before starting a job saves time compared to troubleshooting mid-clean. Whether you run a compact portable kit or a full pure water cleaning system mounted in a van, the same setup logic applies: get every connection right, confirm the water is both flowing and pure, and the results at the glass will follow.
For readers who want a deeper technical explanation of how ion exchange removes dissolved minerals from water, this overview of the deionization process offers useful background on what happens inside a DI resin vessel during purification.
RELATED POSTS
Whole House Reverse Osmosis System: Complete Buyer’s Guide for Clean Water at Home
How Much Does a Reverse Osmosis System Cost
What is the Lifespan of an Offshore Water Treatment System?
Water Filter Housing for RO Systems: Types, Applications & Selection Guide
How Much To Install Water Filter Under Sink?